Stop motion model
Also known as puppet animation, stop-frame and claymation.
Stop-motion animation started at the beginning of the last century with the arrival of film, but it really came of age with the arrival of video & computers. Before that you didn't know how your animation was looking until it came back from the developers, and if something was wrong, your only option was to shoot the whole thing again. But now, with video & computers to assist, we can be absolutely sure of what we are creating, as we create it.
Stop-motion model animation is suitable for 6 years and up.
Stop-motion animation is usually created with puppets, and the most famous stop-frame animated characters are probably Wallace & Gromit, and King Kong.
Fixing it down
With stop-motion animation, the key thing is keeping everything fixed while you work:
- The camera should be on the most solid tripod you can get your hands on
- All the handles must be locked off. If the record button is on the camera or phone, this is even more important
- Move the tripod’s pan-handle out of the way
- Lights have to be kept in the same place, and positioned where they won't get knocked. (Be especially careful if using angle poise lamps). Mark positions on the floor with camera tape.
- Use a solid surface. Seek out the sturdiest surface you can find: built in desks are ideal, fold away tables can be a nightmare. Push it up against the wall, hot glue it down, clamp it to a radiator, lug something more solid across the school - it is worth it. (animating on the floor is a great last choice)
Stop-motion in the classroom
Stop-motion animation can involve a range of techniques, from carefully crafted plasticine characters on lavish sets, to random objects of almost any description moved about on a table. The latter will give a good demonstration of the possibilities, and is a useful demonstration in its own right.
If a whole class is working on a film, divide them into smaller groups, each preparing different scenes; then as the first scenes are being animated, other scenes can be prepared.
Depending on how long the scenes take to animate, children can shift around so that everyone tries animating and operating the equipment.
Usually four children around the set is enough - although you might need more if there are several characters moving at once.
Materials
Character based animation can be made in materials such as plasticine, or other modelling materials, such as model magic, latex, wood or fabric. It depends on the effect you want and the scale of the project.
Set building
In the classroom there may be limited space and the set may only cover one or two tables against a wall. Set building can be great fun as long as a few simple pointers are noted:
- Make sure everything is as solid as possible
- If appropriate glue it down
- However, don't stick everything down too early, as movable props will aid your composition
- Create backgrounds larger than you think you need, this doesn't mean make bigger doors, windows or trees
- Design interior walls to stretch right offscreen; create taller and wider skies
- Plan ahead
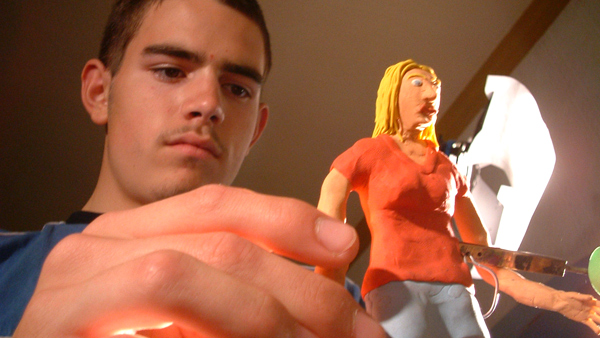
Characters, sets & scale
Although any size of character is feasible: small puppets can be difficult to manipulate, and close-ups on faces might not work. On the other hand, large puppets can be unwieldy.
Pay particular attention to how the character will stand and move, it is important to establish this before actual modelling takes place. Puppets should be as light as possible and certainly not top heavy. A skeleton of soft aluminium wire (more expensive but far superior to ordinary wire) can be twisted together with the feet exaggerated to provide stability. A pinboard or thick polystyrene set base will let you push dress pins through the feet to maintain stability.
Another technique is to use a metal base with magnets positioned under the base to attract metal nuts or plates concealed in the soles of the characters' feet. At a more specialist level, engineered armatures are used to achieve both stability and articulation.
Whatever approach you take to stabilising the characters, try it out before commencing detailed modelling. And, as with all animation, it is important to have a clear idea worked out in a storyboard. For example a minor character at a desk, might not need legs that move, or possibly might not need legs at all!
Facial expressions are possible, but it takes patience and plasticine faces can easily become distorted. Eyes, made from white beads, can be moved using a needle inserted through the hole.
Note on wide shots
Often when working with large groups you try to get all participants involved, and you structure a wide shot with all the characters. With the result that it takes ages to film, you end up with only a few seconds of animation, and the subtle work is obscured by wild crazy characters!
Better to use: close-ups and two shots. You'll create more animation, you'll be able to see the characters and their movement in detail, and it will look more cinematic - good film thrives on a variety of shots. You can still knock out a big wide shot later, when the whole team is experienced.
Lighting for stop-motion
Lighting a stop-frame set is similar to lighting for live-action, it's just on a smaller scale. However, consider also how well plasticine and hot glue will survive if you are using powerful lamps.
We also recommend using lamps rather than daylight for and if possible with blackout. Then you don't have to worry about light changes outside. However, sometimes for convenience you have to rely on daylight. So find a place where no direct sunlight will fall for the whole day, and be aware of the sun moving round and casting shadows.