Drawn
Also known as 2D and Cartoon.
Drawn animation is suitable for 9 years and up
Hand-drawn animation is perhaps the best known form of animation, having been championed by Disney since the 1930's. It is a sequence of drawings that, when filmed, give the impression of movement.
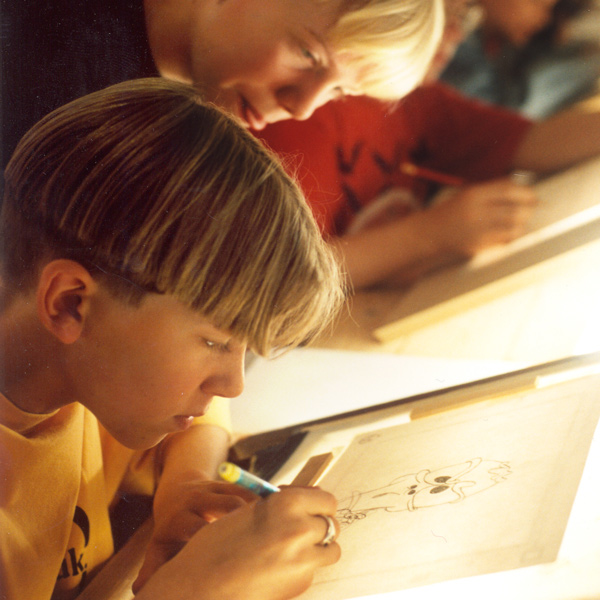
Although drawn animation is perhaps the trickiest to master, there are many benefits in the classroom or group situation. Because much of the work takes place away from the camera, a lot of people can be working simultaneously, and their work can be brought, in turn, to the rostrum for testing & filming.
You will need lightboxes, but these are comparatively easy to make.
The basics
Try to produce lots of drawings, concentrating more on movement and important action to tell the story, rather than finely detailed artwork.
- Keep backgrounds simple
- Avoid shots with lots happening (eg, while the main character is pole vaulting out of the prison courtyard, don't make the the sun comes up and a bird fly across)
- Avoid long duration shots
Pace
Your lightbox helps you 'trace' successive drawings from previous ones. Each drawing will differ slightly (and occasionally significantly) from the previous drawing, and, when filmed in order, the differences show up as movement.
- If the differences between drawings are small, the movement will be slow
- If the differences are large, the pace will be quicker
- If the differences get progressively larger, the movement will accelerate, and if gradually smaller the animation will slow down
- Anything you trace in the same place on every drawing (a tree or a house) will stay still
Inbetweens
Between the 'key' drawings - which show a character's key poses - are the 'inbetweens', which show the intermediate positions. The use of these inbetweens produce a smoother movement or help slow a sequence down.
Young people often create their drawings in chronological order; and for beginners this is the easiest way to see how progressive small changes show up as animated movement. However, with older children, encourage them to grasp how 'key' frames can be drawn first, and then inbetweens added later to flesh-out the sequence.
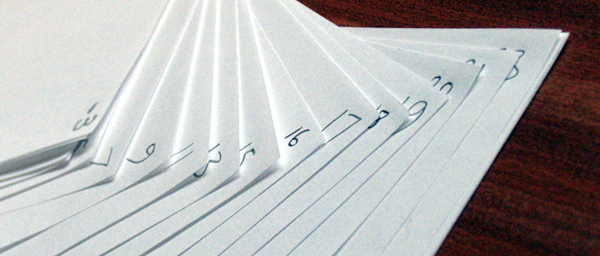
Numbering
Insist each drawing is numbered as it is created, to keep things in the right order. This helps if you test a sequence a number of times, and it also helps to reorder drawings, and put things back together if sheets get dropped.
To make it easy to generate inbetweens it's good to number all drawings with odd numbers 1,3,5,7 etc. Then if you need to slow the sequence down you can start by creating the even numbers. If you need more inbetweens add 'a's and 'b's - or children may prefer to create 1.5 and a 2.5 and a 3.5 etc.
If a shot needs a little bit more at its start, then you can make a few drawings backward from the first drawing. -1, -3, -5, etc.
Lightbox
A lightbox helps you create a new drawing based on your last, it's an enhanced method of tracing. A lightbox is needed for drawn animation only
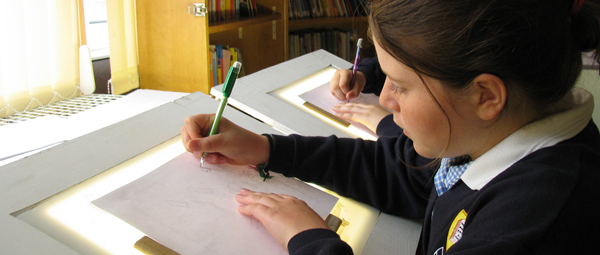
A lightbox is a flat translucent surface with a light behind it and a method for 'registering' your paper, to make sure each sheet is drawn and filmed in the right place.
You can buy one, or you might find some available in your photography department. However making your own lightbox and registration system is fairly simple.
Making your own lightbox
Use white translucent perspex, larger than A4, with a cool lamp behind:
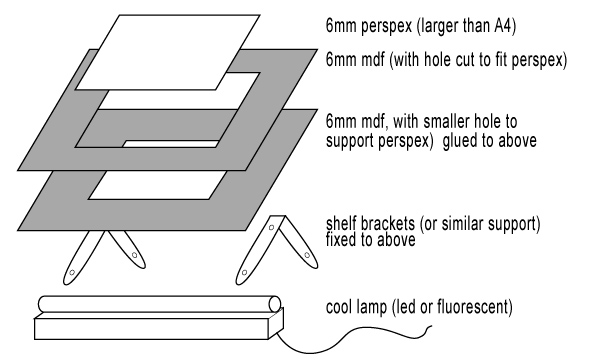
There are many ways this design can be improved; but the advantage of this over a solid box is these are stackable.
Registration
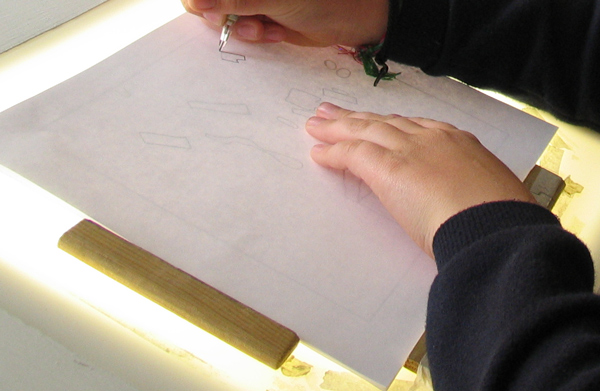
It is essential to keep your paper in exactly the same place when you are tracing and when you are filming. This is called correct 'registration'.
Professional animators use a 'pegbar' and specially punched paper to register their work, however it is fiddly and the holes can tear with over enthusiasm. Relatively accurate registration can be achieved using A4 paper and two flat lengths of wood fixed to perspex at 90 degrees, one for the left hand edge of the paper and one for the bottom edge. (Use double-sided tape to stick down the lengths of wood, then masking tape over to prevent the paper slipping underneath.)
Paper
It is best to use A4 photocopy paper (80gsm) as this is thin enough for seeing through three sheets or more on a lightbox, and is just about strong enough to take paint. It's also readily available when young people start drawing fast....