Understanding Brightness
The final brightness of your shot all depends on what photographers and cinematographers call exposure. Exposure describes how much light you let into the camera to give you a correctly lit scene.
Over-exposed is when too much light goes onto the sensor and you have an overly bright image and Under-exposed is when not enough light reaches the sensor and you get a dark image.
Exposure can be controlled in five different ways:
- aperture/iris
- shutter speed
- neutral density filters
- gain
- changing the lighting
The 5 ways to adjust exposure
1. Aperture/iris
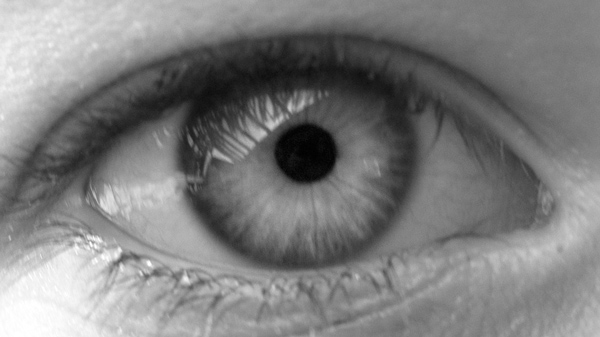
A camera lens contains an iris, which, like our own eyes, can be used to control the amount of light passing through it, by altering the size of a small hole behind the lens. When conditions are bright you need a small hole or aperture (perhaps f8 or f11) when it's dull the iris is wide open (maybe f2.8, f4) to let in more light.
Aperture also effects focus and on darker scenes you may find it harder to focus because of a wide apertures.
2. Shutter speed
Default shutter speed is around 1/50th of a second. Often a camera adjusts this speed and it doesn’t cause a problem. However you might notice your picture looking slightly odd, for example it can introduce a blurry movement in low-light situations when it's set very slow; or it can overly sharpen movement if set to fast in bright conditions. If you do need to adjust the shutter speed (because you are working in extreme conditions) consult your manual.
3. Gain
This is a useful last resort which adjusts how bright the image appears. It doesn't actually increase the amount of light coming in, but instead boosts the image brightness digitally. However, at the same time it can add some nasty grain (degradation) to the image. It is not available on all cameras, however if you can, set it to off (0dbs).
4. Neutral density filter
On fancier cameras you may have neutral density filters which simply reduce the amount of light coming through the lens by filtering it through dark glass. Perfect for much too bright sunny Scottish days.
5. Change the lighting
It sounds obvious, but you can also change exposure by changing the amount of light in your scene. Easier with interiors.
White balance
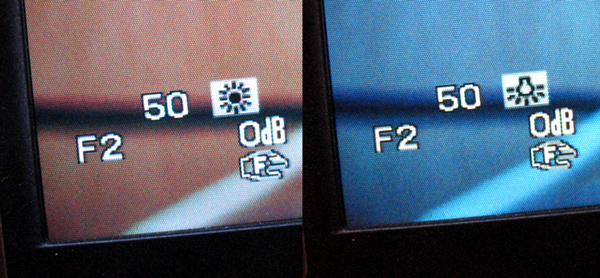
If your camera has a 'white balance control' it can generally be set to auto, exterior, tungsten or manual.
While our eyes adjust naturally to changes in colour during the day, the camera can't adjust so easily. In order to avoid filming scenes with strange colour casts we need to tell the camera what colour the scene is.
Manual setting
The reason you 'set your White Balance' is to avoid your actor having a blue face in one shot and an orange face in the next. The theory is that if your white is always the same, then all the other colours will stay the same as well.
To set your white balance hold a piece of white paper where your subject will be, zoom in so white fills the screen and set the white balance using the relevant control (check your manual).
Daylight & tungsten presets
If you have no time to set a manual white balance then use these fixed colour settings, usually indicated by a sun and lightbulb icon. They may also be useful when the colours are changing all the time such as at a gig.
Windy bright days
Conditions like these can be problematic: one minute your subjects are bathed in striking sunlight, the next they are flat, blue and dull. There's no easy answer! Not only do you have exposure problems (and wind noise on your microphone) but also potential white balance shenanigans! Possibly a good time for your auto white balance!
Once you have perfected white balance, your scenes can start to look boringly similar. Understand it, master it, and then use it creatively. We can use colour to inform the emotional content of the scene; classically that would be: warm firelight hues for your romance scene, and cold minimalist blues for the tragic rejection.