Lighting
Lighting for film and video can be complex and cinematographers may take many hours to light a scene. Fortunately, there's usually a great ball of fire in the sky that is simple to use and can help create a beautiful look. Also works indoors!
The two main 'types' of light
Although there are hundreds of different qualities of light available and thousands of ways to use them; really light can be split into just two types - hard light and soft light.
Hard light
also known as: point or direct
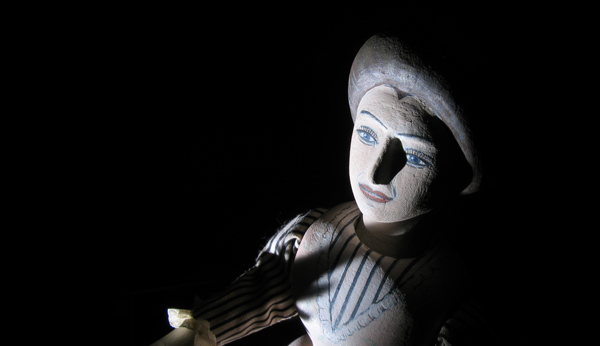
This light is usually more dramatic and creates defined shadows. Some examples of hard light are:
- One film light pointing directly at a subject
- Sunlight without cloud
- An angle poise lamp
Soft light
also known as: diffuse
This gives a more gentle feel to your compositions, with softer edged shadows. (or sometimes no shadows at all) There are a number of ways it can be created:
- The sun completely obscured by cloud, or filming in total shade
- Reflecting a lamp off the ceiling or a white wall
- Bouncing light off a large white reflector (this could be a sheet of builders polystyrene or a Lastolite pop out reflector)
- Placing some diffuse material over a sun blasted window (net curtains do a pretty good job)
- Use special lights like Kino-flo's (which are a banks of bulbs positioned close together)
Some people suggest tinfoil as a soft reflector, this is often too mirror-like and you end up with a hard light reflection, there's nothing like flat white.
Usually the bigger and nearer the soft light is the softer everything becomes.
Exterior lighting
For continuity, try to keep the same lighting conditions. For example: if you are videoing a drama on two separate days and it is sunny one day and raining the next, the lighting might look different and this can be tricky to edit. Record shots that will appear consecutively at the same time. (There are other logical reasons for doing this :-)
Similar problems arise if you film animation in daylight, use lamps if you can.
Cloud cover
100% cloud cover is often the easiest condition to film in. It won't give you the lushest results, but they should at be consistent, and you can film from all angles without much tweaking. (Obviously ominous black clouds are not so good)
Bright sunlight
Bright sunlight can give sumptuous cinematic results, but it's tricky to use and you are often better in some form of shade. A high budget feature might use a huge white awning. You need simple solutions: dappled sunlight through trees, a huge umbrella, or the shade of a big building.
If you do film on bright day
- Try not to film in the middle of the day, early morning and evening are usually more subtle
- Don't believe the old adage about keeping the sun behind the camera, this tends to flatten things and make your actors squint
- On closeups - use bounced light to help illuminate faces and fill in shadows cast by the sun
- Use manual exposure to stop the auto-exposure function wreaking havoc, making one face bleach out and the reverse shot shadowy
- Don't allow direct sunlight to catch your lens
- Check how clean your lens is
Interior lighting
If you've got a set of lights it is very tempting to use them, but with modern video cameras and light pouring through reasonable-sized windows, you can often get away without supplementary lighting. Keep it simple and first of all ascertain whether additional lighting is needed for your scene.
Very often it's the people who know very little who use the most elaborate technical apparatus. All Sven Nykvist needs is three lamps and a little greaseproof paper
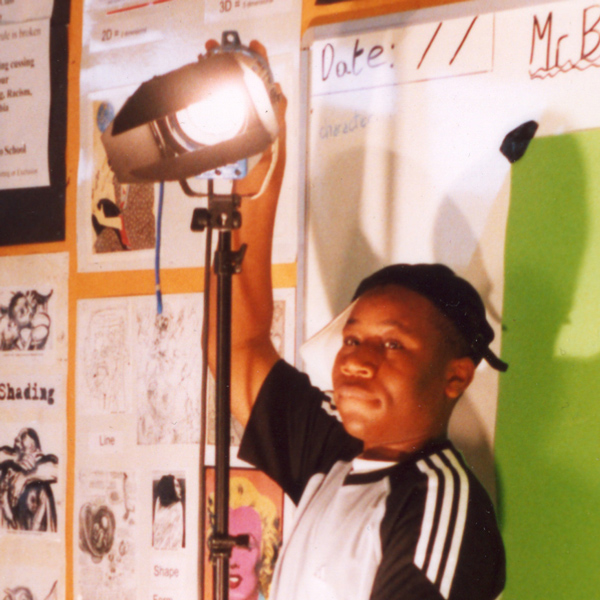
Film lights
Lighting with all sorts of other methods is possible; you can even use builders' lights. However, being able to adjust your lights easily and safely is very important. For this you will need 'film lights' which should have barn doors and may have a focusing ability. A number of companies make and sell lights, and you are probably looking for 2 or 3 units of around 500W-800W each.
Light safety
Be careful with lights at all times. This is not an exhaustive safety list but observe the following as a minimum:
- Use the heaviest stands you can
- Don't put lamps too high without sandbags on the base
- Just don't put lamps high at all
- Beware of trailing cables, and never have cables in the air that can be tripped on and pull over stands
- Don't move hot lamps - let them cool first (not only safer but it shortens bulb life)
- Don't use worn units or worn cabling
- Lighting outside – do you need to - beware of water and electrics
- Switch off and unplug blown bulbs immediately
- Only use fireproof materials near lamps
Practicals
Practicals are lamps you actually see in the shot as part of the set. Angle poise lamps, standard lamps, pendant bulbs, etc. Used inventively, and with a bright bulb inside they can be the saviour of the low budget filmmaker's interior work.
Lighting set ups
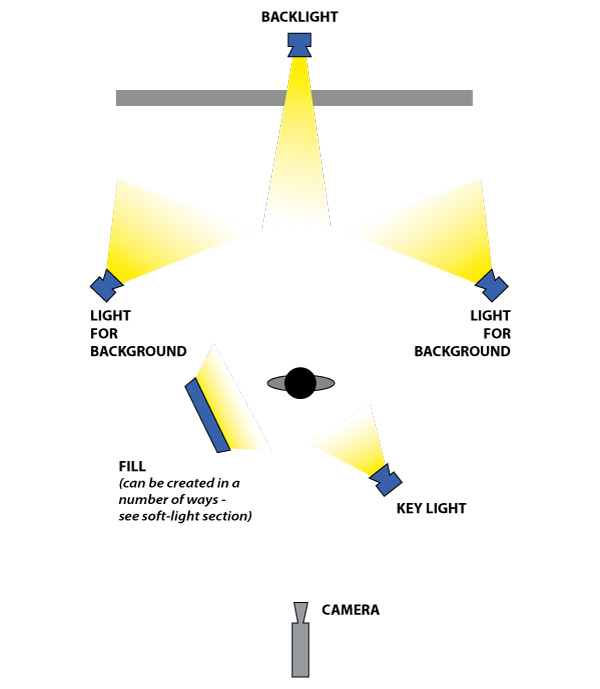
The key-light is the main light and pretends to be the sun or a light in the room. Setting the key is the most important, make sure it is in the right place before setting any other lights.
The fill-light does what it says and fills in the shadows and stops the key light casting too deep shadows. It also controls the contrast range of the scene. You may also have other lights for the background.
The backlight is often from above and directly behind, and is used to separate the subject from the background and add depth.
A super simplified set up
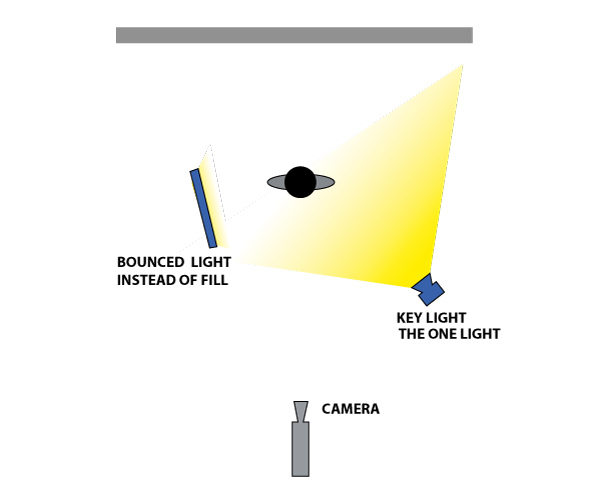
The key-light has been moved a little and flooded (it's beam made wider). And the fill light is now being bounced light from the key-light. The background is also covered by the same light.
Backlight (the pretty one)
Carefully designed backlight is what creates the lush look you get in many Hollywood movies. It's a bit tricky to set up because you have to get the backlight in the right place to create the effect, at the same time as avoiding hitting the lens with the backlight (creating a lens flare across your image) - persevere - it is worth the effort.
Backlight (the ugly one)
There is another type of backlight: if you film with a window directly behind your performers, you may get a very bright window and silhouette figures. Film parallel to the window, keeping the windows out of shot - this should provide good modelling of your subjects. If you do need to film with a bright window behind the subject use manual exposure to lighten up your subject and add some bounced light.
Bounce
Don't underestimate the difference a little bounced light can have on a close up. It is easy to set up: simply hold something white (white card as small as A3 can help) underneath and slightly to one side of your subject, so that the main light source (often the sun) is 'bounced' into the face. The effects seem subtle to the naked eye, but can make all the difference. Also works well for stop-frame model animation.